


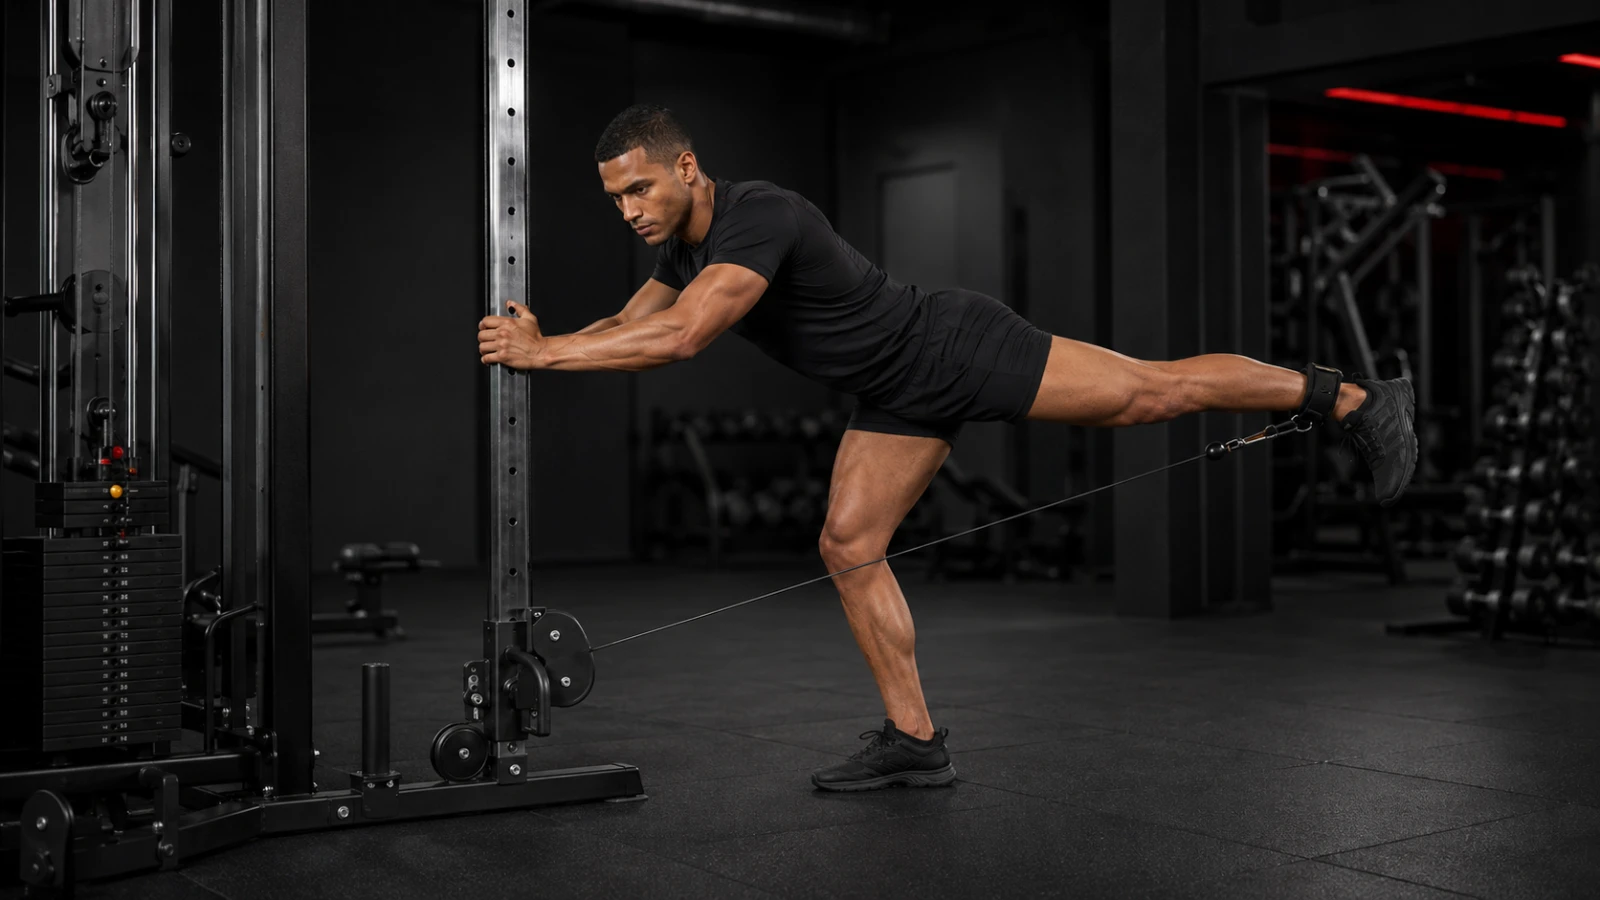
The glute kickback is a unilateral hip-extension exercise that primarily trains the gluteus maximus. You can perform it on the floor, with a resistance band, on a cable machine or using a dedicated kickback machine.
The exercise looks simple, but effective execution depends on one important distinction: your leg should move from the hip while your pelvis and lower back remain controlled. Kicking higher is not necessarily better. Once the available hip extension ends, extra movement usually comes from rotating the pelvis or arching the lower back.
Exercise detail | Glute kickback |
|---|---|
Primary muscle | Gluteus maximus |
Supporting muscles | Gluteus medius, hamstrings, core and Erector Spinae |
Movement pattern | Hip extension |
Exercise type | Unilateral isolation or accessory exercise |
Difficulty | Beginner to intermediate |
Equipment | None, resistance band, cable or machine |
Best use | Glute activation, accessory training and hypertrophy-focused work |
Main mistakes | Swinging, excessive spinal arching, pelvic rotation and using too much weight |
What Is a Glute Kickback?
A glute kickback involves moving one thigh behind the body through hip extension. The gluteus maximus is the main muscle responsible for this action, assisted by the hamstrings. The gluteus medius and minimus contribute more to pelvic control and hip stability, particularly when you are standing on one leg.
Unlike a squat, lunge or deadlift, a kickback involves relatively little movement at the supporting knee and does not require both legs to produce force simultaneously. This makes it useful as a targeted accessory exercise, but it should not be viewed as a replacement for heavier compound movements.
A balanced glute programme may include:
A squat pattern
A hip-hinge pattern
A unilateral movement
A hip thrust or bridge
A glute-isolation exercise such as the kickback
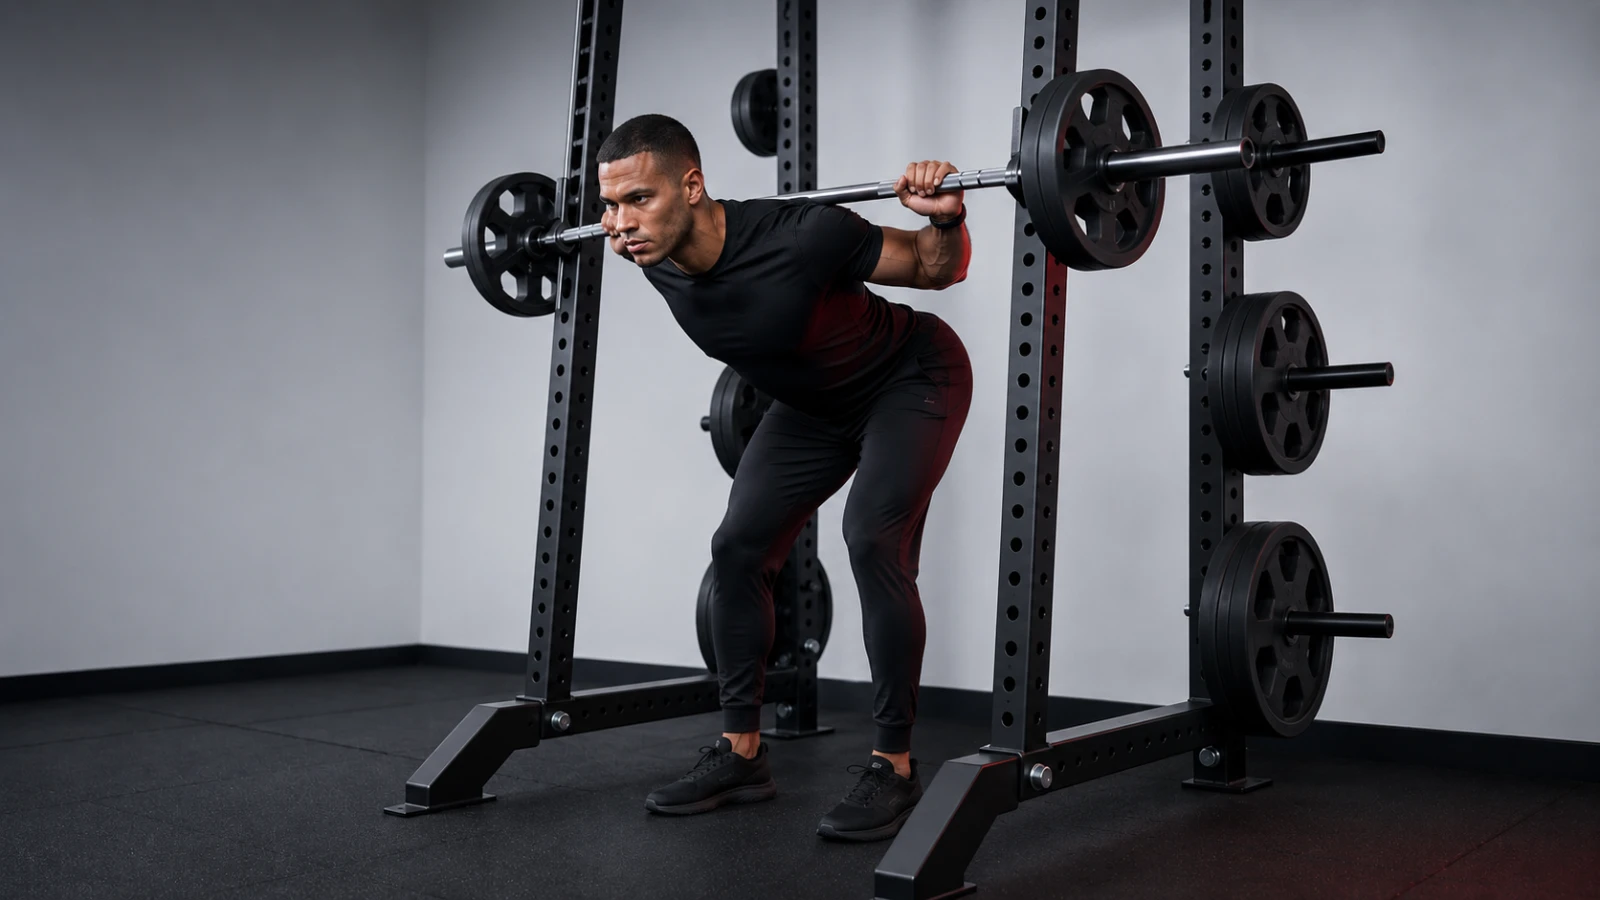
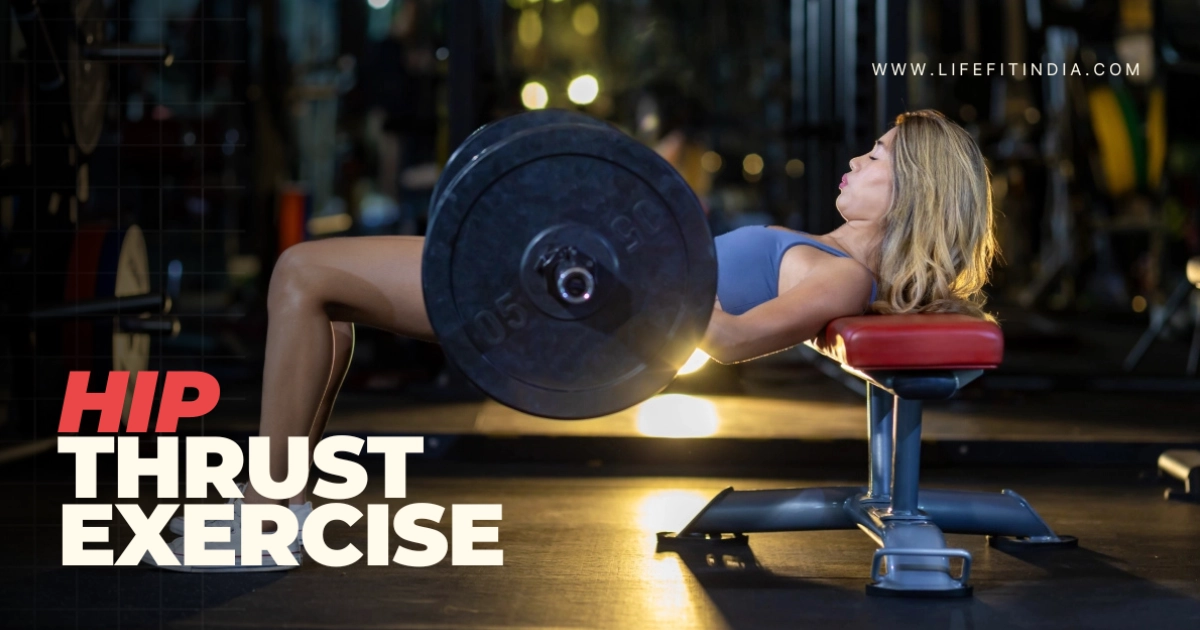
For example, you could combine kickbacks with the barbell back squat, hip thrust exercise and a dumbbell rear lunge to train the glutes through different positions and loading patterns.
Glute Kickback vs Donkey Kick: What Is the Difference?
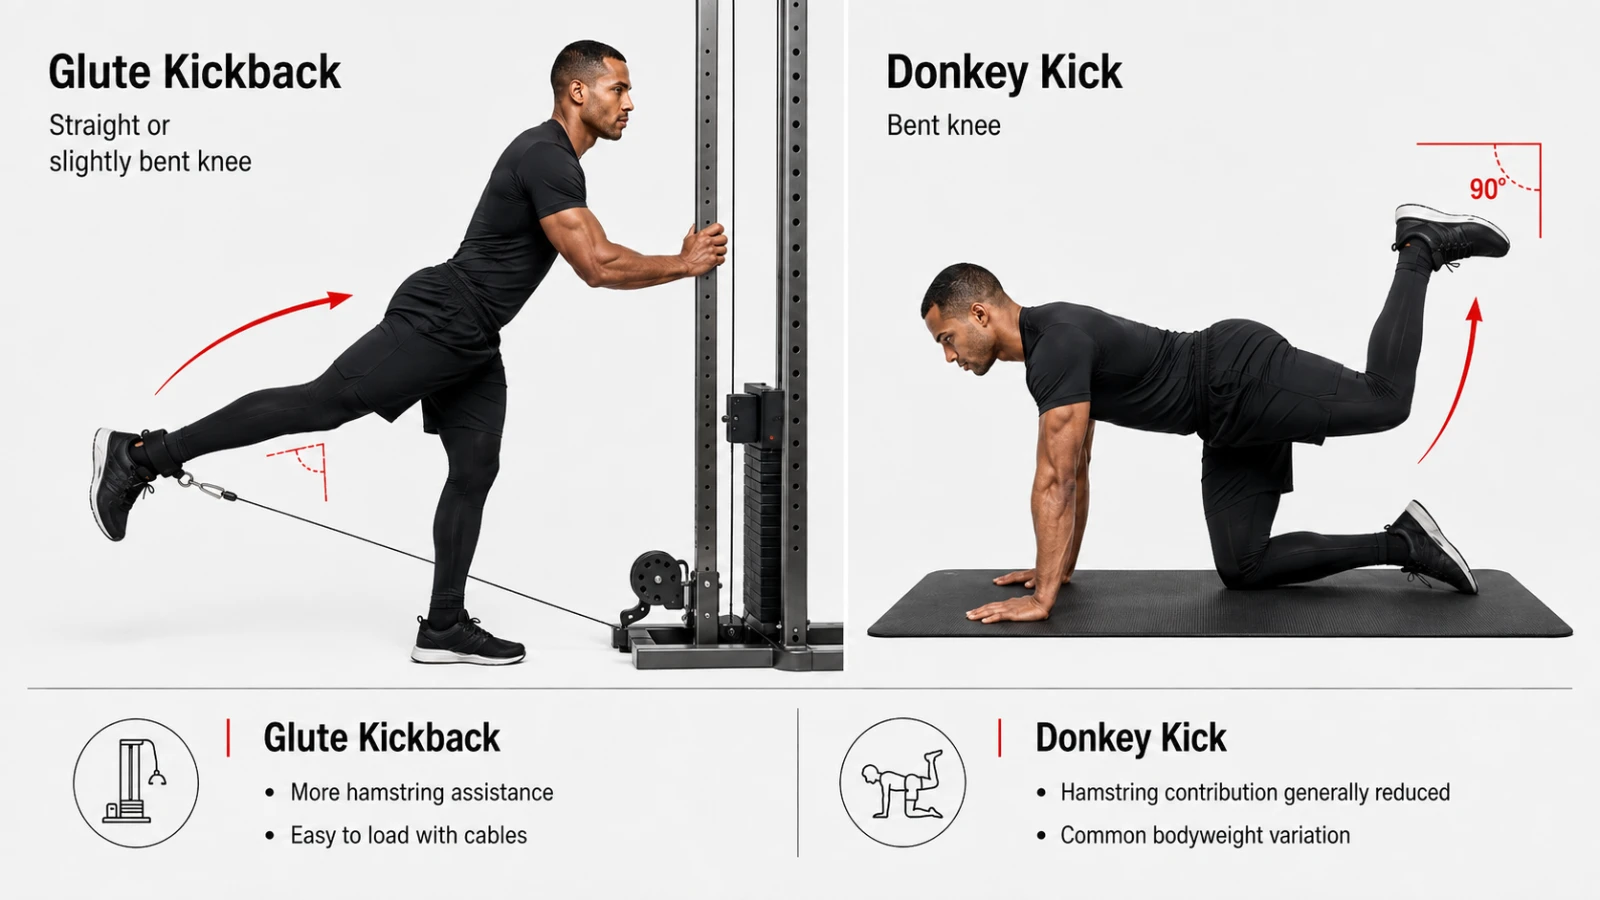
The names are often used interchangeably, but they usually describe slightly different versions of hip extension.
Feature | Straight-leg glute kickback | Bent-knee donkey kick |
|---|---|---|
Knee position | Straight or slightly bent | Bent to approximately 90 degrees |
Main joint action | Hip extension | Hip extension |
Hamstring contribution | Usually greater | Generally reduced by knee flexion |
Common setup | Cable, band or quadruped | Quadruped floor position |
Loading potential | Moderate to high | Low to moderate |
Main form risk | Swinging or rotating the pelvis | Arching the lower back |
The hamstrings cross both the hip and knee. Bending the knee shortens them at the knee joint, which can reduce their capacity to contribute as strongly to hip extension. It does not, however, completely switch them off.
Both versions can train the glutes. The more useful option depends on your equipment, comfort, stability and ability to maintain pelvic control.
Glute Kickback Muscles Worked
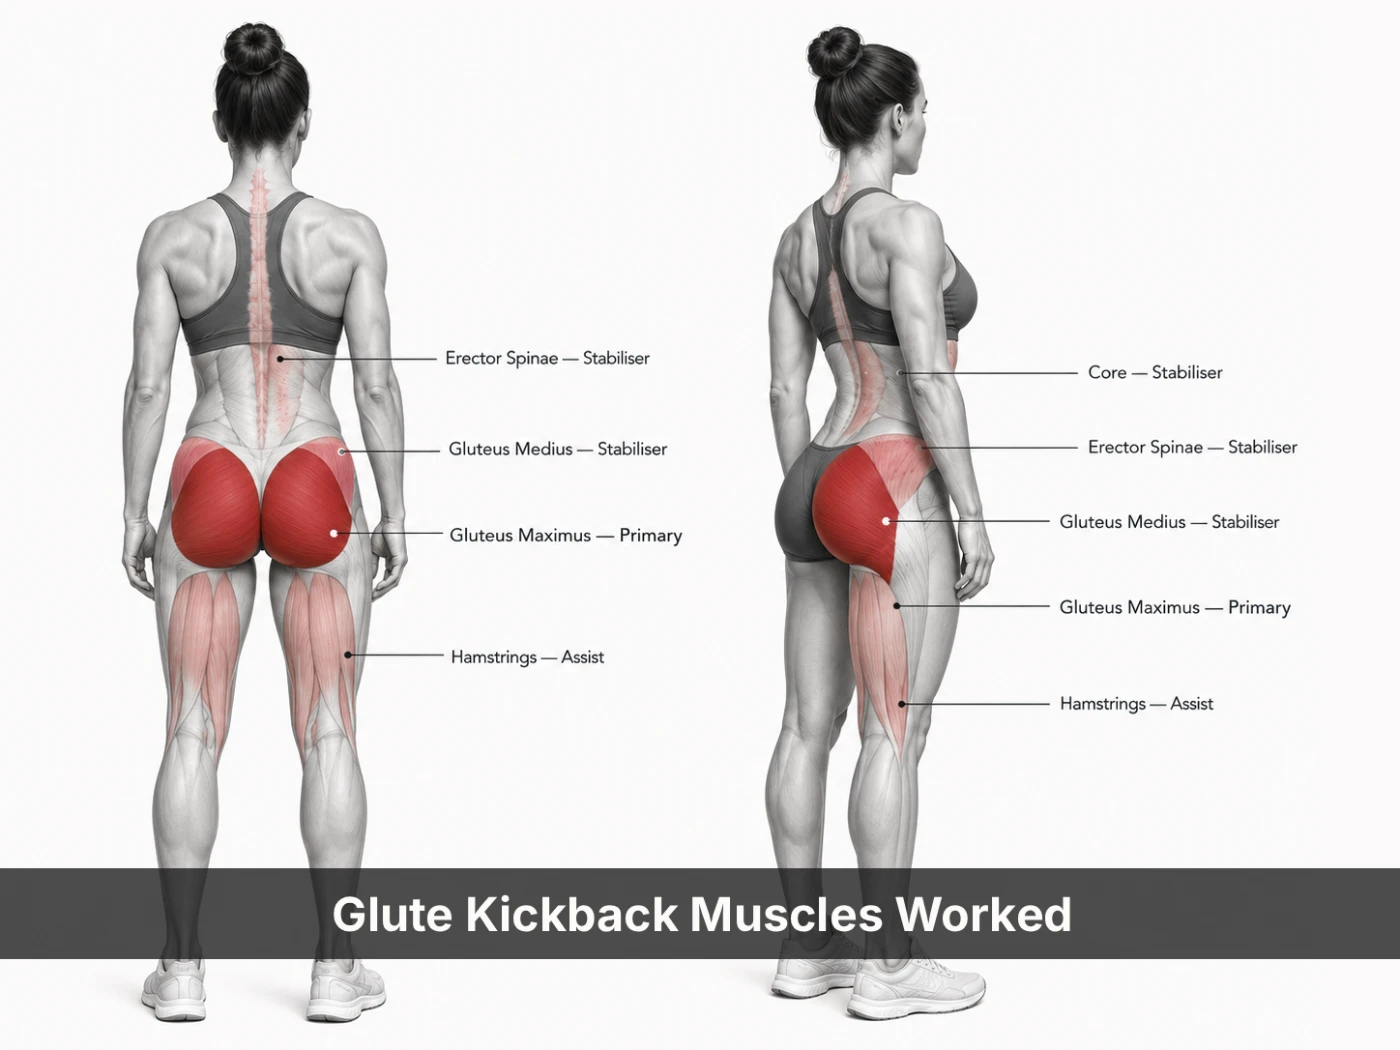
Gluteus Maximus
The gluteus maximus is the primary target. It is the largest and most superficial of the three gluteal muscles, and one of its principal actions is extending the thigh behind the body.
During a well-controlled kickback, the gluteus maximus produces hip extension while the trunk and pelvis remain relatively stable.
Gluteus Medius and Minimus
The gluteus medius and minimus are important hip abductors and pelvic stabilisers. Their role becomes especially relevant during standing kickbacks because the supporting side must prevent the pelvis from dropping or rotating.
Moving the working leg slightly outward may increase the abduction component, but that does not make every diagonal kickback automatically superior for the “upper glutes.” Small changes in cable path, torso position and individual anatomy can all alter how the exercise feels.
Hamstrings
The hamstrings assist with hip extension, particularly when the working knee remains straight. Some people therefore feel straight-leg kickbacks in the hamstrings as well as the glutes.
A slight bend in the working knee may reduce hamstring discomfort, but it should remain consistent throughout the repetition. Continually bending and straightening the knee often turns the movement into a swinging action.
Core and Erector Spinae
Your abdominal muscles and Erector Spinae help control the trunk and pelvis. Their job is not to create an exaggerated back arch but to resist unwanted movement while the hip extends.
You may feel a modest amount of trunk effort. Intense lower-back pressure, however, often suggests that the working leg is travelling beyond the hip’s available range.
How to Do a Bodyweight Glute Kickback
The floor version is a useful starting point because it allows you to learn the movement without external resistance.
1. Set Your Hands and Knees
Begin on all fours.
Place your:
Hands beneath your shoulders
Knees beneath your hips
Head in line with your spine
Toes relaxed or tucked according to comfort
Spread your weight evenly between both hands and the supporting knee.
2. Brace Your Trunk
Gently tighten your abdominal muscles as though preparing to absorb a light impact.
You do not need to flatten your back aggressively. Maintain a comfortable, controlled spinal position while keeping both sides of the pelvis facing the floor.
3. Extend One Leg Behind You
Move one leg backward, gradually straightening the knee if performing the straight-leg variation.
Lead through the heel rather than flicking the foot upward. Think about increasing the distance between your working knee and your head rather than simply lifting the foot as high as possible.
4. Stop Before Your Lower Back Arches
Continue until the thigh approaches alignment with the torso or until you reach the end of your controlled hip-extension range.
The exact height will vary. Stop sooner when:
Your abdomen begins to drop
Your lower back arches noticeably
Your hips rotate open
Your body shifts heavily to one side
A lower but cleaner repetition is more useful than a high kick produced through spinal movement.
5. Return Slowly
Lower the leg under control for approximately two seconds.
Keep tension through the glute and avoid dropping the knee rapidly. Complete your planned repetitions before switching sides.
Simple Form Cues
Move from the hip, not the lower back.
Keep both hip bones facing the floor.
Reach backward rather than kicking upward.
Control the return.
Stop when pelvic control ends.
The quadruped position also requires trunk stability. Practising the plank exercise can help you understand how to brace without holding your breath or excessively rounding your back.
How to Do a Cable Glute Kickback
The cable glute kickback makes progressive loading easier than most bodyweight versions. It also keeps external resistance applied as the leg moves, although the mechanical challenge is not identical at every point in the range.
1. Set Up the Cable
Attach a padded ankle cuff to the lowest pulley setting.
Secure it around one ankle and check that:
The cuff cannot slide over your shoe
The attachment does not press painfully against the ankle
The cable has a clear path
You have a stable part of the machine to hold
Stand facing the cable column.
2. Establish the Starting Position
Step back until the cable is under light tension before the repetition begins.
Hold the machine with one or both hands. Keep the supporting knee slightly bent and hinge forward only as much as needed to create a stable position.
Your torso does not need to be perfectly upright or fixed at a universal angle. Choose the position that lets you keep your pelvis square without the cable rubbing against your supporting leg.
3. Brace and Extend the Hip
Tighten your trunk and drive the cuffed leg backward.
Keep the working knee straight or slightly bent, but avoid changing its angle repeatedly. The motion should come mainly from the hip.
Do not throw the chest forward to make the leg move farther.
4. Pause Without Overextending
Pause briefly when you reach the end of controlled hip extension.
You should feel the working glute contract, but you do not need to force an aggressive squeeze or lean backward. End the repetition before your pelvis rotates or your lower back begins producing most of the movement.
5. Control the Return
Allow the leg to travel forward slowly until you reach the starting position.
Do not let the weight stack pull you abruptly toward the machine. Keep tension and balance throughout the return.
How Much Weight Should You Use?
There is no universal kilogram target because cable systems differ in pulley ratios, friction and stack calibration.
Choose a resistance that allows you to complete roughly 8–20 strict repetitions while maintaining:
A stable supporting leg
Square hips
A controlled return
No swinging
A consistent knee angle
Approximately one to three technically clean repetitions in reserve
Reduce the weight when you need to rotate your body, kick explosively or shorten the range to complete the set.
Build a more versatile lower-body training area
Cable stations allow you to train glute kickbacks alongside rows, presses, pulldowns and other accessory movements. Explore the LIFE FIT Pro Series Functional Trainer for home and commercial strength-training setups.
Glute Kickback Benefits
1. Provides Direct Glute-Focused Resistance
Kickbacks allow you to train hip extension without using a barbell, heavy dumbbells or a complex lifting setup.
This can make them useful after demanding compound exercises, when you want additional glute work without adding another heavily loaded full-body movement.
2. Trains One Side at a Time
Each leg works independently. This makes side-to-side differences in balance, coordination and strength easier to notice.
Unilateral training does not automatically correct an imbalance, but it allows you to programme an appropriate number of controlled repetitions for each side.
3. Offers Several Progression Options
You can progress from:
Bodyweight kickbacks
Light resistance bands
Stronger bands
Cable resistance
A dedicated glute kickback machine
Progress does not have to mean adding weight immediately. Better pelvic control, a slower return and a larger usable range are also meaningful improvements.
4. Fits Home and Gym Workouts
Floor kickbacks require only a mat. Standing band versions need very little space and are useful when a gym cable station is occupied.
Cable and machine versions offer more convenient resistance progression for commercial-gym training.
5. Complements Compound Glute Exercises
Kickbacks train a relatively specific portion of a lower-body programme. Exercises such as squats, lunges, step-ups, Romanian deadlifts and hip thrusts expose the glutes to different joint positions and loading demands.
A systematic review of loaded exercises found high gluteus-maximus excitation across several compound movements, including step-ups, split squats, lunges, deadlifts and hip thrust variations. That supports using multiple movement patterns rather than depending on a single isolation exercise.
The dumbbell step-up is one practical option for adding a more heavily loaded unilateral movement.
Are Glute Kickbacks Effective for Building Glutes?
Glute kickbacks can contribute to glute growth, provided they are trained with enough resistance, effort, volume and progression.
A 2025 systematic review and meta-analysis found that resistance training had a moderate overall effect on gluteus-maximus hypertrophy. The review reported beneficial effects from both single-joint and multi-joint approaches, including programmes using kneeling hip extension, hip thrusts, squats and combinations of glute exercises. However, the findings do not establish the conventional cable kickback as superior to every other movement.
Bodyweight hip-extension studies also show that quadruped variations can produce measurable gluteal excitation. Selkowitz and colleagues found that quadruped hip extension activated the measured gluteal muscles more than the tensor fascia lata in both flexed- and extended-knee variations under laboratory conditions.
A broader systematic review by Macadam and Feser found substantial variation in gluteus-maximus excitation across bodyweight hip-extension exercises. Differences in technique, participants and EMG-normalisation procedures made direct rankings difficult.
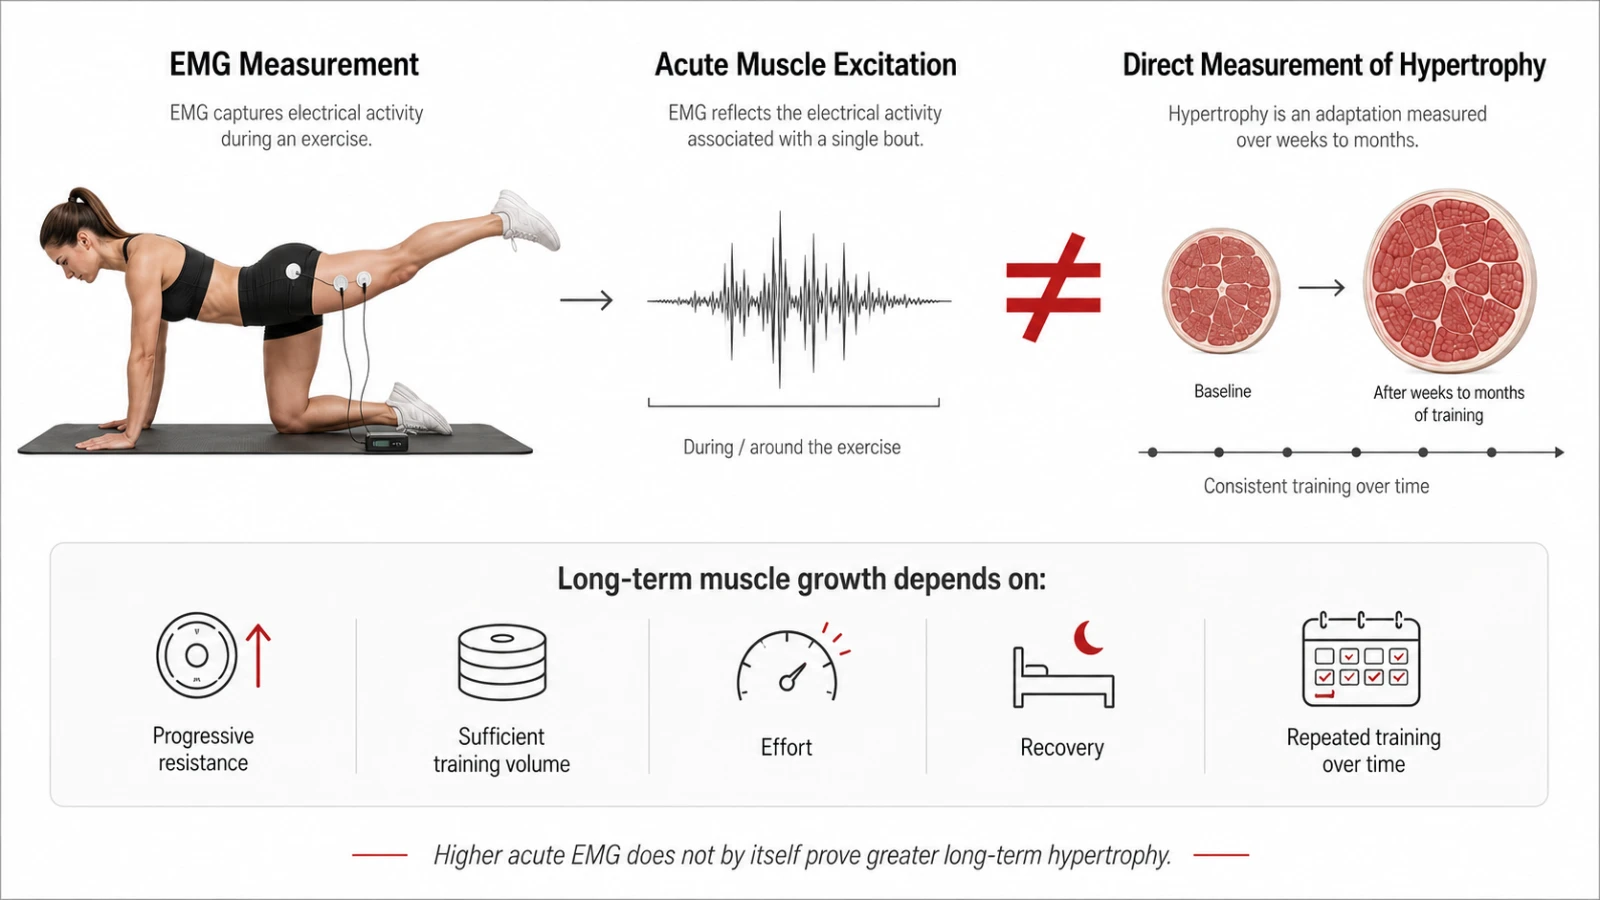
Why EMG Does Not Tell the Whole Story
Electromyography, or EMG, estimates electrical activity associated with muscular excitation during an exercise. It does not directly measure muscle growth.
Research on interpreting EMG signals cautions that a higher acute reading should not automatically be treated as proof of greater force production or superior long-term hypertrophy.
In practical terms, the most effective kickback variation is one you can:
Perform consistently
Load progressively
Take reasonably close to muscular fatigue
Recover from
Combine with a complete lower-body programme
Execute without losing control of the pelvis and trunk
Glute Kickback Variations
Variation | Equipment | Best use | Stability demand | Loading potential |
|---|---|---|---|---|
Quadruped straight-leg kickback | Mat | Learning hip extension | Moderate | Low |
Bent-knee donkey kick | Mat or band | Beginner activation | Moderate | Low–moderate |
Standing band kickback | Resistance band | Home workouts | High | Moderate |
Cable glute kickback | Cable and ankle cuff | Progressive accessory work | High | High |
Diagonal cable kickback | Cable and ankle cuff | Extension with an abduction component | High | Moderate–high |
Glute kickback machine | Dedicated machine | Stable progressive loading | Low | High |
Plank kickback | Bodyweight | Trunk and pelvic control | Very high | Low |
Resistance-Band Kickback
Secure a band around your ankles or attach a long band behind you. Hold a stable surface and extend one leg backward without leaning excessively.
The main limitation is that band resistance rises as the band stretches. This can make the end of the range disproportionately difficult.
Diagonal Cable Kickback
Move the working leg backward and slightly outward.
Use only a small diagonal path. Rotating your entire torso or opening the pelvis changes the exercise and reduces control.
Glute Kickback Machine
Adjust the torso pad, foot platform and starting position according to the machine design.
Press through the working foot while keeping the pelvis against the support. Machines reduce balance demand, which can make it easier to concentrate on progressive resistance.
Plank Kickback
Begin in a high-plank or forearm-plank position and lift one leg through a small controlled range.
This variation places more demand on the abdominals, shoulders and supporting hip. It is usually less suitable for maximising external glute load.
Common Glute Kickback Mistakes and How to Fix Them
Mistake | Why it happens | How to correct it |
|---|---|---|
Arching the lower back | The leg travels beyond available hip extension | Shorten the range and brace before moving |
Rotating the hips open | The load is too heavy or stability is limited | Reduce resistance and keep the pelvis square |
Swinging the leg | Excessive weight or speed | Lift and lower under deliberate control |
Kicking too high | Leg height is mistaken for greater glute work | Stop when further movement requires spinal extension |
Changing the knee angle | Momentum replaces controlled hip extension | Maintain the chosen knee position |
Leaning excessively | The torso moves to create artificial range | Use stable support and a modest hinge |
Standing too close to the cable | There is little tension at the start | Step back until the cable remains lightly loaded |
Supporting knee collapsing inward | Balance, fatigue or load is poorly managed | Reduce weight and hold the machine securely |
Why You Feel Kickbacks in the Wrong Muscles
I Feel Them in My Lower Back
You are probably extending the spine as the leg reaches the top.
Reduce the range, tighten your abdomen and imagine reaching the leg backward rather than lifting the foot toward the ceiling.
My Hamstring Keeps Cramping
The hamstrings assist with hip extension, particularly when the knee remains straight.
Try a slight knee bend, reduce the load and avoid forcing a maximal squeeze. If cramping continues, stop the set and reassess your position.
I Feel My Standing Leg More
Standing kickbacks require the supporting hip to stabilise the pelvis.
Hold the machine with both hands, reduce the resistance and place most of your attention on keeping the pelvis level. A machine or quadruped variation may be more appropriate when balance is limiting the working side.
I Cannot Feel My Glute
Not feeling a dramatic burn does not prove that the muscle is inactive.
First check the basics:
Lower the resistance
Slow the return
Keep the pelvis square
Use a manageable range
Pause briefly without arching
Avoid shifting onto the supporting side
Evaluate the exercise by your control and progression, not sensation alone.
The Cable Hits My Standing Leg
Move slightly to the side of the pulley or create a small diagonal cable path.
Do not step so far sideways that the exercise becomes primarily hip abduction.
Glute Kickback Sets, Reps and Programming
Goal | Sets and repetitions | Effort | Workout placement |
|---|---|---|---|
Warm-up or movement practice | 1–2 × 10–15 per side | Light | Before compound work |
Beginner technique | 2–3 × 10–15 | Moderate and controlled | Early or middle of session |
Hypertrophy accessory | 3–4 × 8–20 | Around 1–3 reps in reserve | After primary lifts |
High-repetition finisher | 2–3 × 15–25 | Near fatigue with strict form | End of session |
Home band training | 3 × 12–20 | Progress band tension gradually | Main or accessory movement |
How to Progress
Use this order:
Improve pelvic control.
Increase the usable range.
Slow the lowering phase.
Add a brief pause.
Add repetitions.
Increase resistance.
Do not add weight when it reduces the movement to a short, swinging kick.
How Often Can You Train Kickbacks?
Most people can include glute-focused training two or more times per week, depending on total volume and recovery.
A meta-analysis on training frequency found that frequency has little independent effect on hypertrophy when weekly training volume is equated.
This means your weekly glute-kickback sets can be distributed according to recovery, preference and the rest of your programme rather than following one mandatory schedule.
Where Should Glute Kickbacks Go in a Workout?
Before Compound Exercises
Use light bodyweight or band kickbacks as movement practice.
Keep the sets easy. A warm-up should prepare the glutes without creating enough fatigue to reduce performance on squats, lunges or deadlifts.
After Compound Exercises
This is usually the most practical position for loaded cable or machine kickbacks.
Your heavier exercises receive priority, while kickbacks provide additional targeted volume afterward.
At the End of the Workout
High-repetition kickbacks can work as a finisher when form remains controlled.
Stop the set when you can no longer keep the pelvis stable—not only when the weight stack becomes impossible to move.
Example Glute-Focused Session
Barbell back squat — 3–4 sets
Romanian deadlift — 3–4 sets
Dumbbell rear lunge — 3 sets per side
Cable glute kickback — 3 sets per side
Hip-abduction exercise — 2–3 sets
Glute Kickback vs Other Glute Exercises
Exercise | Main advantage | Main limitation |
|---|---|---|
Glute kickback | Direct unilateral hip-extension resistance | Limited total loading |
Hip thrust | High external loading in shortened hip extension | Requires more equipment and setup |
Romanian deadlift | Loads the glutes and hamstrings in a lengthened position | Greater technique demand |
Squat | Trains several major lower-body muscles | Less isolated glute emphasis |
Glute bridge | Stable and beginner-friendly | External loading may become awkward |
Donkey kick | Easy home option | Limited resistance progression |
No single exercise wins every comparison.
Kickbacks are useful when you want targeted unilateral work. Hip thrusts offer greater loading potential. Romanian deadlifts challenge the posterior chain in a more lengthened position, while squats and lunges train the glutes alongside the quadriceps and other lower-body muscles.
The best programme combines compatible exercises rather than searching for one movement to do everything.
Safety, Modifications and When to Stop
A working sensation or fatigue in the glutes is expected. Sharp pain, numbness, radiating discomfort or persistent hip or lower-back pain is not a normal training response.
Use these modifications when needed:
Reduce the range if your lower back arches.
Use bodyweight before adding resistance.
Hold stable support during standing variations.
Choose a machine when balance is the main limitation.
Add padding beneath the knees for floor kickbacks.
Reposition an uncomfortable ankle cuff.
Stop using a variation that repeatedly causes joint pain.
People returning from an injury, managing persistent pain, recovering from surgery or training during pregnancy should obtain individual guidance from an appropriately qualified healthcare professional.
Frequently Asked Questions
Yes. Kickbacks directly train hip extension and can contribute to stronger or larger glutes when performed with appropriate resistance, effort and progression. They work best as part of a broader programme rather than as the only glute exercise.
They can contribute to glute hypertrophy when sets are sufficiently challenging and resistance progresses over time. Research supports both single-joint and multi-joint hip-extension exercises for gluteus-maximus growth, but there is no evidence that ordinary kickbacks are uniquely superior.
They are closely related hip-extension exercises. A conventional kickback generally uses a straight or slightly bent working leg, while a donkey kick usually keeps the knee bent at approximately 90 degrees.
The most common reason is extending the leg beyond your available hip range. Shorten the movement, brace your abdomen and stop before the pelvis tilts or the lower back arches noticeably.
Either position can be useful. A straighter knee generally allows more hamstring assistance, while a bent knee may reduce some hamstring contribution. Choose the version you can perform with better control and without discomfort.
Perform light kickbacks before squats only as movement practice. Place challenging cable or machine kickbacks after squats so fatigue does not reduce your performance on the heavier compound exercise.
Cable kickbacks usually offer more precise load progression. Bands are cheaper, portable and practical for home workouts. Neither option is universally better; your equipment and ability to maintain form should guide the choice.
Final Takeaway
The glute kickback is most effective when you treat it as a controlled hip-extension exercise—not a contest to see how high you can lift your leg.
Keep your pelvis stable, brace your trunk and stop the repetition before your lower back takes over. Begin with a variation you can control, progress it gradually and combine it with squats, hinges, lunges and hip thrusts for more complete glute development.
Planning a home, studio or commercial training space? Explore LIFE FIT strength equipment or submit a gym-equipment quotation request for product selection, layout planning and current pricing.
0 Comments
Loading comment form…
Loading comments…